The “Handful of Spices” Problem
Every beginner masala chai recipe you find online says the same thing: “Add a handful of spices.” A handful. As if your hand and my hand and your neighbor’s hand are all the same size, and as if “some cardamom” is a useful measurement for someone who has never brewed stovetop chai before.
This vagueness is why most first attempts end in disappointment. Too many spices and it tastes like a potpourri accident. Too few and you get warm, vaguely flavored water. Nobody tells you exactly how much to use, in what order, or how to know when each step is actually done.
This recipe fixes that. Every ingredient is measured in exact grams. Every step has a visual or aromatic cue so you know when to move on. And the whole thing is built around one number — the golden ratio — that makes scaling effortless whether you are brewing for yourself or for four people.
The 1:1 Golden Ratio Explained
Here is the foundation: 1 part water to 1 part whole milk by volume.
That is it. That is the golden ratio for chai. For two cups, you use one cup of water and one cup of whole milk. For four cups, two and two. For one cup (sad but valid), half and half.
Why does 1:1 work so well? Because it produces chai with enough body to feel substantial, enough water for proper tea and spice extraction, and the right balance of milk fat to carry those spice flavors into every sip. Shift too far toward water and you get a thin, tea-forward brew. Go heavier on milk and the spice flavor gets muted. The 1:1 ratio sits right in the sweet spot.
If you have ever wondered why your homemade chai tastes flat compared to the stuff at an Indian restaurant, your ratio is almost certainly off. This is the same starting point recommended in our spicy water fix guide, and it scales perfectly for any number of servings.
Want to understand the deeper science behind why whole milk in particular behaves differently from oat or almond? Our milk science deep dive covers the protein-tannin chemistry in detail.
The Exact Ingredient List (2 Servings)
No guessing. No “to taste” for anything except the sweetener. Here is what you need, weighed out.
Liquids
- 150 mL water (about 2/3 cup)
- 150 mL whole milk (about 2/3 cup)
Tea
- 6 g Assam CTC tea (about 2 level teaspoons) — not loose-leaf, not tea bags. CTC granules specifically. These tiny pellets have a massive surface area compared to whole leaves, which means faster and stronger extraction in the short boil time. If you only have tea bags, rip two open and dump the contents in. It works, though CTC is better.
Spices
- 3 green cardamom pods (about 1 g) — lightly cracked
- 1 cm fresh ginger (about 3 g) — peeled, smashed flat
- 1 cinnamon stick (about 3 cm / 1 inch piece)
- 2 whole cloves (about 0.3 g)
- 3 black peppercorns (about 0.3 g)
Sweetener
- 8-10 g sugar (about 2 teaspoons) — or jaggery, to taste
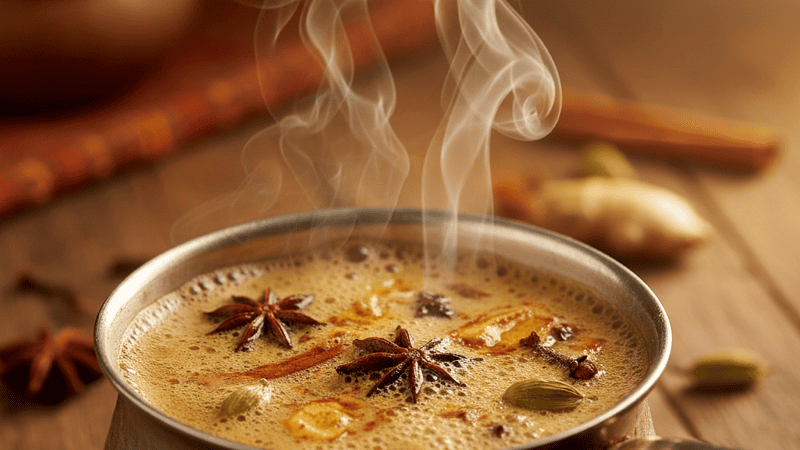
That is the full list. No star anise, no fennel, no nutmeg. Those are all valid additions, but they are variations. This is the foundation recipe — the one you learn before you start improvising.
If you want to know why these five spices and not others, our gateway spices guide explains what each one contributes to the cup. Short version: cardamom brings the floral high notes, ginger adds the heat, cinnamon rounds the base, cloves and pepper add depth without making things bitter.
Why Grams Matter for Beginners
You might be thinking: “Do I really need a kitchen scale for tea?” Honestly? For your first few pots, yes.
Here is the thing. A “teaspoon” of CTC tea can weigh anywhere from 2 to 4 grams depending on how tightly you pack it. That is a 100% margin of error. With cardamom pods, the difference between 2 pods and 5 pods changes the drink entirely. When you are learning a new recipe, you want to eliminate variables so you can figure out what you actually like — then adjust from a known baseline.
After you have made this five or six times, you will not need the scale anymore. You will just know what 6 grams of CTC looks like in your teaspoon, and you will know how hard to crack the cardamom. But until then, the precision removes the guesswork that sends most beginners back to instant chai packets.
The 5-Step Method
Total time: about 10 minutes from cold pot to cup. Here is every step with the visual and aromatic cues that tell you when to move on.
Step 1: Crack the Spices (1 minute)
Place cardamom pods on your cutting board and press with the flat side of a knife until they split open. You should see the small black seeds inside — those hold the essential oils. Smash the ginger the same way until the juice starts to pool on the board. Break the cinnamon stick in half.
Do not skip this. Whole, intact spices sitting in water release a fraction of their flavor. Cracking them open is the single highest-impact thing you can do for your masala chai. This is the difference between “some spices were nearby” and “the spices are actually in the drink.”
Quick test: pick up the cracked cardamom and sniff it. Can you smell it immediately? Good. If not, crack harder.
Step 2: Spice Boil (3 minutes)
Add the 150 mL water and all cracked spices to a small saucepan. Bring to a rolling boil and let it go for 3 full minutes.
What you are looking for: the water should turn slightly yellow from the ginger, and your kitchen should smell aggressively of cardamom and ginger. If you cannot smell the spices clearly from a few feet away, give it another minute.
This step extracts the water-soluble flavor compounds and essential oils from the spices. The reason you start with water and not milk is that many spice compounds dissolve better in water than in fat. Rushing this step means weaker spice flavor in the final cup, and there is no recovering it later.
Step 3: Add Tea (2 minutes)
Add the 6 g of Assam CTC tea to the boiling spice water. Keep it at a rolling boil for 2 minutes.
What you are looking for: the liquid should turn a deep, dark reddish-brown — almost opaque. If you can still see the bottom of the pot through the liquid, it needs more time. This is the tannin extraction phase, and you need those tannins for body. The milk will soften the astringency later. If you want to understand why the rolling boil matters so much, we have a whole article on that.
Step 4: Add Milk and Hit the Aroma Peak (3-4 minutes)
Pour in the 150 mL whole milk. The temperature will drop immediately. Bring everything back to a boil.
Now watch the pot. The liquid will rise as it approaches a boil — this is the critical moment. Let it rise, then reduce heat just before it overflows. Let it settle. Bring it back up. Repeat this rise-and-settle cycle 3 times.
Each rise incorporates air and the malai (that protein-fat skin forming on the surface) back into the liquid. This is not ritual for the sake of ritual — it is what builds the thick, creamy body of proper chai. The casein proteins in milk bind with the tea tannins during this process, which is exactly why the astringency mellows out and the texture gets silky.
The Aroma Peak: Somewhere during the second or third rise, you will notice a shift. The smell in the kitchen goes from “spiced milk” to something richer, deeper, more unified. The individual spice notes blur together into a single complex aroma. That is the aroma peak — the moment when the fat, protein, tannins, and spice oils have fully integrated.
This is not some abstract concept. You will genuinely notice it. One rise it smells like cinnamon milk, and the next rise it smells like chai. Strain immediately after this.
Step 5: Sweeten and Strain
Add sugar or jaggery to the pot. Give it one final stir. Pour through a fine mesh strainer into cups.
Drink it hot. Masala chai does not improve with waiting — the tannins keep reacting, the spice oils dissipate, and the malai reforms as a skin on the surface. If you have leftover chai and want to save it, check our reheating guide before you reach for the microwave.
Scaling the Golden Ratio
The beauty of the 1:1 ratio is that it scales linearly. Here is a quick reference table:
| Servings | Water | Milk | Tea | Cardamom | Ginger | Cloves |
|---|---|---|---|---|---|---|
| 1 | 75 mL | 75 mL | 3 g | 2 pods | 0.5 cm | 1 |
| 2 | 150 mL | 150 mL | 6 g | 3 pods | 1 cm | 2 |
| 4 | 300 mL | 300 mL | 12 g | 6 pods | 2 cm | 4 |
| 6 | 450 mL | 450 mL | 18 g | 9 pods | 3 cm | 6 |
Spice quantities scale roughly linearly too, though you can round down slightly for larger batches — 6 pods for 4 servings rather than 8. Spice flavor concentrates a bit more in larger volumes because there is less surface-area-to-volume evaporation.
One note on scaling up: when you are making 4-6 servings, step 4 takes longer because the larger volume of milk drops the temperature more. Expect an extra minute or two before the first rise. Do not crank the heat to compensate — that is how you get a boil-over.
Equipment You Actually Need
You do not need a fancy setup. Here is the minimum:
- A small saucepan (1-2 liter capacity). Stainless steel or aluminum, either works. Nonstick is fine but harder to clean after the milk film builds up.
- A fine mesh strainer. The kind with a handle that sits over a cup. Tea strainers with tiny holes work best — you want to catch the CTC granules and spice bits.
- A kitchen scale (for your first few brews). Any cheap digital scale that reads grams will do. After you have the amounts memorized, you can eyeball it.
- A knife and cutting board for cracking spices.
That is it. No special chai pot, no mortar and pestle, no thermometer. If you want to build out a more complete setup later, our ten-dollar chai kit guide covers everything.
Troubleshooting Your First Pot
Every beginner hits the same handful of problems. Here are the fixes.
“It tastes like spicy milk, not chai.” Your tea boil was too short. The liquid should be nearly opaque before milk goes in. Give it another minute next time. The tea needs those 2 full minutes of hard boil.
“It is bitter and harsh.” You boiled the tea too long after adding milk, or your water-to-milk ratio was off. Stick to 2 minutes of tea boil and the 1:1 ratio. Also check whether your CTC tea is very fine-grained — some brands extract faster and need less time.
“I can barely taste the spices.” You did not crack them hard enough. Whole, intact pods sitting in water release almost nothing. Smash them open. You should see the seeds. If you cracked them and still have this problem, your spice boil was too short — let it go 4 minutes instead of 3.
“The milk curdled or looks grainy.” This happens with some plant milks and occasionally with ultra-pasteurized dairy. If you are dairy-free, use barista-grade oat milk and add it at a gentler temperature. See our dairy and non-dairy milk guide for a full breakdown of which alternatives work and which curdle.
“It boiled over and now my stove is a mess.” Welcome to the club. Every chai maker has done this at least once. Stay by the pot during Step 4 and keep your hand on the heat dial. The rise happens fast — sometimes in under 10 seconds.
Where to Go From Here
Once this recipe feels automatic — and it will after three or four pots — you have a foundation for everything else on this site:
- Add a shot of espresso for a dirty chai
- Make a batch of concentrate for weekday mornings
- Experiment with rose, lavender, or hibiscus additions
- Build a complete ten-dollar starter kit with everything you need
- Try the afternoon ritual version with a slower pace and better snacks
- Explore what “chai” actually means and why every culture brews it differently
But start here. Start with the golden ratio, exact measurements, and five clear steps. The “handful of spices” era of your chai life is over.
And if your first pot is not perfect? Make another one. Chai is forgiving, and practice costs about fifty cents a cup. You will get there faster than you think.